MVC Style HUD in UE4
Posted On: Mar 07, 2017Hey guys, we are going to take a short break from the fog of war stuff and Unity! How exciting! Today we are going to make a Model View Controller style HUD in Unreal Engine 4! So let's get started!
MVC In Unreal Engine 4
To start I'm going to explain how and why we use the model view controller pattern in UE4. We are going to break things into a model view and controller, where the model is the player pawn (and sometimes the GameMode), the view is the UMG Widget, and the controller is the HUD actor. So the AHUD will send the UMG Widget data from the Pawn to display. "But twig, the HUD actor can draw stuff!" you might say, and that's true! However if you have an artist who wants to change the look of the HUD then they will have to go through a programmer to place it and give it functionality. But if we use the UMG then the art of the HUD and the code of the HUD are decoupled. Also UMG adds a lot of animation and other options to your UI.
Now that you have a basic understanding of the method we are going to use and why we would want to do it like this, lets look at the code!
Setup
Open the Epic Games launcher and launch the latest version of unreal engine 4, at the time of writing I used 4.14.3 and I've done something similar on 4.10 so it should be fine. Once the new / open project screen comes up after the engine loads, select the "New Project" tab then the "C++" tab, then select the First Person project template. Name your project whatever you want, I named mine "HUD_Test".
The View
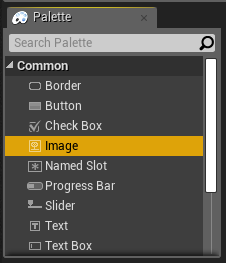
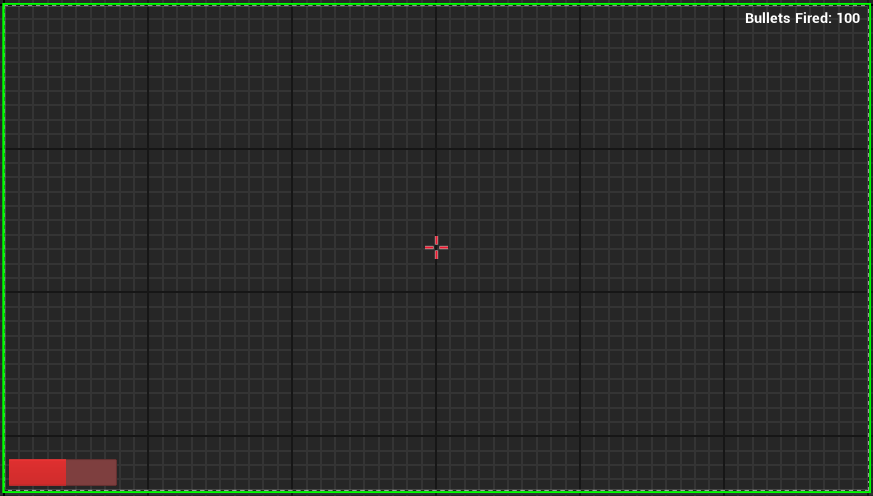
We are going to set up the view to display the crosshair, health, and how many bullets have been fired. Once your project loads, go over to the editor and add a folder in the "FirstPerson" folder called "Widgets", the whole path will look like this "/Content/FirstPerson/Widgets/". Once inside the widgets folder right click and select "User Interface->Widget Blueprint" call it "HUD". Once created, open it and add an image object from the palette by dragging it onto your canvas and name it "Crosshairs".
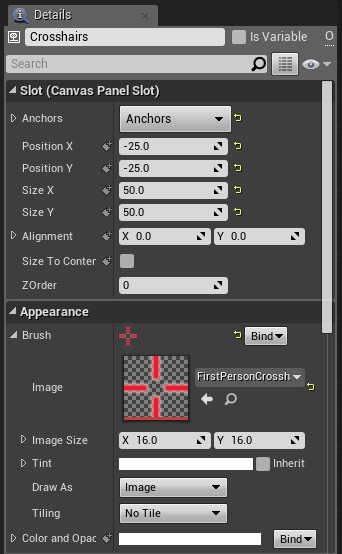
Now look on the right side of the Blueprint window to find the "Details" pane, drop down the "Anchors" category and select the center, then set position x and y both to -25 and set size x and y both to 50. Then under the Appearance tag drop down the "Brush" object and set the "Image" to "FirstPersonCrosshair". Also this doesn't need to be a variable, at the top of the Details pane you can uncheck "Is Variable"
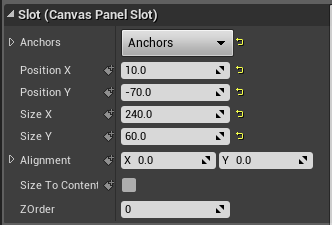
Now add a progress bar that will function as our Health bar and name it Health. Anchor it to the lower left and copy the image's position and size.
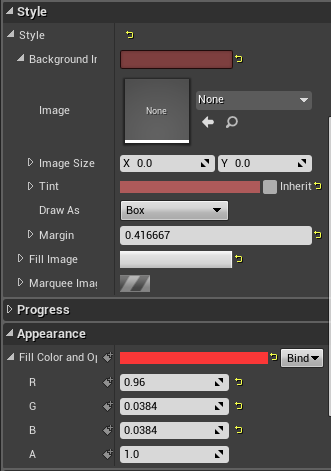
For the "Style" set the background to a dark red, two categories down is "Appearance" set the "Fill Color" to a brighter red than the background.
Next we are going to add text for the bullet counter. From the palette drag the Text object over to your canvas. Set the Anchor to the top right and copy the image for the position and size. Also note that the "Is Variable" isn't checked so check that as we will need to access it in the blueprint.

You can change the font and text size or color if you want just make sure that "Bullets Fired: 100" fits on the screen still. With that done you should have something like this:
Code and Blueprints
OK, now that most of the leg work is done we can finally look at some code! We are going to make a new UUserWidget class, so navigate to "/C++ Classes/HUD_Test/" (where "HUD_Test" is your project name) and right click and select the "New C++ Class...". In the upper right click the "Show all Classes" then search for "UserWidget", select that for the parent class and hit next. Name your class HUDView and click "Create Class", at this point it probably won't compile correctly but it should give you a message that it has been added. Now open Visual Studios (if it isn't already), and open "{Your_Project_Name}.Build.cs" and make it look like this:
using UnrealBuildTool;

public class HUD_Test : ModuleRules
{
	public HUD_Test(TargetInfo Target)
	{
		PublicDependencyModuleNames.AddRange(new string[] { "Core", "CoreUObject", "Engine", "InputCore", "HeadMountedDisplay" });

		PrivateDependencyModuleNames.AddRange(new string[] { "Slate", "SlateCore" });
	}
}
And then in your project header "{Project_Name}.h" add these includes:
#ifndef __HUD_TEST_H__
#define __HUD_TEST_H__

#include "EngineMinimal.h"
#include "Runtime/UMG/Public/UMG.h"
#include "Runtime/UMG/Public/UMGStyle.h"
#include "Runtime/UMG/Public/IUMGModule.h"
#include "Runtime/UMG/Public/Blueprint/UserWidget.h"

#endif
Now we can add code to the HUDView, it's really simple as the actual implementation is going to be done on the Blueprint side. We have 2 methods one for setting the health (SetHealthPercent) and one for setting the bullets fired (SetBulletsFired):
#pragma once

#include "Blueprint/UserWidget.h"
#include "HUDView.generated.h"

UCLASS()
class HUD_TEST_API UHUDView : public UUserWidget
{
	GENERATED_BODY()

public:
	UFUNCTION(BlueprintImplementableEvent)
	void SetHealthPercent(float percent);

	UFUNCTION(BlueprintImplementableEvent)
	void SetBulletsFired(int32 NumberOfBullets);
};
Now we can compile, first try to do it in Visual Studios (or xcode) if you run into an error fix them, then compile in editor. I wrote the program and experienced a lot of errors along the way so I didn't write the code how I'm presenting it to you now, if you find an error that wasn't due to a typo (on your end) then let me now in the comments.
Switch back to the editor and open our HUD blueprint. On the top right there are the "Designer" and "Graph" views, switch to the graph. On the main bar (where compile, save, etc are) click on "Class Settings", now in the lower left Details pane select the Parent Class to be "HUDView".


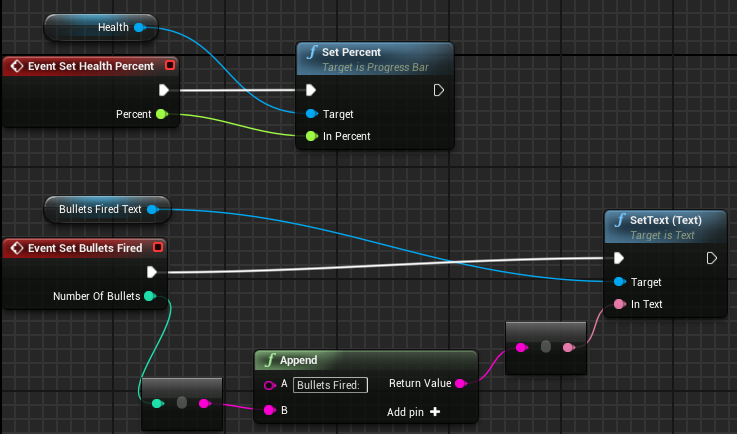
For the graph we are going to add the SetHealthPercent and the SetBulletsFired events, do so by right clicking and searching for those methods. Make your graph look like this (I'm getting kinda lazy right now, don't want to explain this over text when the graph is... worth a thousand words):
Now we need to add data to our model (the Character), so in visual studios (or xcode) open the {ProjectName}Character.h file and at around line number 79 add this (note that the protected tag is already there):
	int32 BulletsFired;

protected:

	const float MaxHealth = 50;
	float Health;
And at line number 49 add this method under the public tag:
float GetHealthPercent();And finally add these methods at line 110:
void OnTakeDamage();
void OnHealDamage();
Now open the corresponding .cpp file, at the end of BeginPlay (line 101) add this:
Health = MaxHealth;Then in the SetupPlayerInputComponent method we are going to add 2 new actions (We'll need to setup these in the engine's ini files, but I'll explain that later):
PlayerInputComponent->BindAction("Damage", IE_Pressed, this, &AHUD_TestCharacter::OnTakeDamage);
PlayerInputComponent->BindAction("Heal", IE_Pressed, this, &AHUD_TestCharacter::OnHealDamage);
OK now in the OnFire method (right below the previous method) we are going to add BulletsFired++ after the ProjectileClass and World checks, should be line number 148.
Sorry for the spotty code editing, there is a lot of code in this class and I didn't want to post things that are unnecessary. If you got lost there will be a link to the project on my github account at the end of this post. Now on to the new methods!
void AHUD_TestCharacter::OnTakeDamage()
{
	Health = FMath::Max(Health - 1, 0.0f);
}

void AHUD_TestCharacter::OnHealDamage()
{
	Health = FMath::Min(Health + 1, MaxHealth);
}

float AHUD_TestCharacter::GetHealthPercent()
{
	return Health / MaxHealth;
}
Some basic stuff, the OnTakeDamage lowers the character's health by 1, unless it goes below 0. OnHealDamage heals for 1 unless it goes above the MaxHealth. And GetHealthPercent does just that!
Time to have this all come together! Open your HUD header file: {ProjectName}HUD.h. We are going to be removing the DrawHUD method as the UMG blueprint will be doing all the rendering. We will be overriding the Actor's BeginPlay and Tick methods and adding a few fields for us to use. Here is what the header file should look like:
#pragma once

#include "GameFramework/HUD.h"
#include "HUDView.h"
#include "HUD_TestCharacter.h"
#include "HUD_TestHUD.generated.h"

UCLASS()
class AHUD_TestHUD : public AHUD
{
	GENERATED_BODY()

public:
	AHUD_TestHUD();

	virtual void BeginPlay() override;
	virtual void Tick(float DeltaSeconds) override;

private:
	TSubclassOf WidgetTemplate;

	UHUDView* HUDView;

	AHUD_TestCharacter* Player;
};
Open that .cpp file! We are going to clear out the contents of the constructor and we are going to get the blueprint we created earlier. We are then going to make the BeginPlay method to get our player (the model) and spawn our UMG blueprint. Finally we are going to poll the player for updates in the Tick method, oh yeah delete the DrawHUD implementation. Here is what we come up with:
#include "HUD_Test.h"
#include "HUD_TestHUD.h"
#include "Engine/Canvas.h"
#include "TextureResource.h"
#include "CanvasItem.h"

AHUD_TestHUD::AHUD_TestHUD()
{
	static ConstructorHelpers::FClassFinder HUDViewObj(TEXT("/Game/FirstPerson/Widgets/HUD"));
	WidgetTemplate = HUDViewObj.Class;
}

void AHUD_TestHUD::BeginPlay()
{
	Super::BeginPlay();

	// Get owner.
	Player = Cast(GetOwningPawn());
	// spawn hudview.
	if (WidgetTemplate)
	{
		HUDView = CreateWidget(GetWorld(), WidgetTemplate);
		if (!HUDView->GetIsVisible())
		{
			HUDView->AddToViewport();
		}
	}
}

void AHUD_TestHUD::Tick(float Dt)
{
	Super::Tick(Dt);

	if (HUDView && Player)
	{
		HUDView->SetHealthPercent(Player->GetHealthPercent());
		HUDView->SetBulletsFired(Player->BulletsFired);
	}
}
That's all for the code, compile and resolve any errors then head over to the editor we still need to setup the input before we test it!
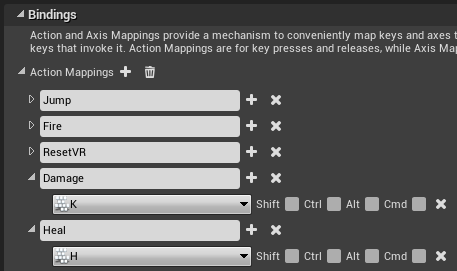
In the editor got to "Edit->Project Settings" and on the left under "Engine" there is an "Input" button, click that. Under "Bindings" there is an "Action Mappings" list, we are going to add 2 mappings, one for Damage and one for Heal. I mapped them to the keys 'K' and 'H', respectively. Here is what you should have:
Awesome! Now either cook the content in the editor and launch in your IDE or compile in editor and play around!
Conclusion
Well I hope this gave you a nice understanding of the MVC pattern in respect to the unreal engine. I'm not sure if this is best way to do it, maybe the programmer could do everything in the AHUD and make key elements exposed in blueprints. Anyway, this is what we used in BYOB and I think it ended up working really well.
Here is the source if you want to take a look.